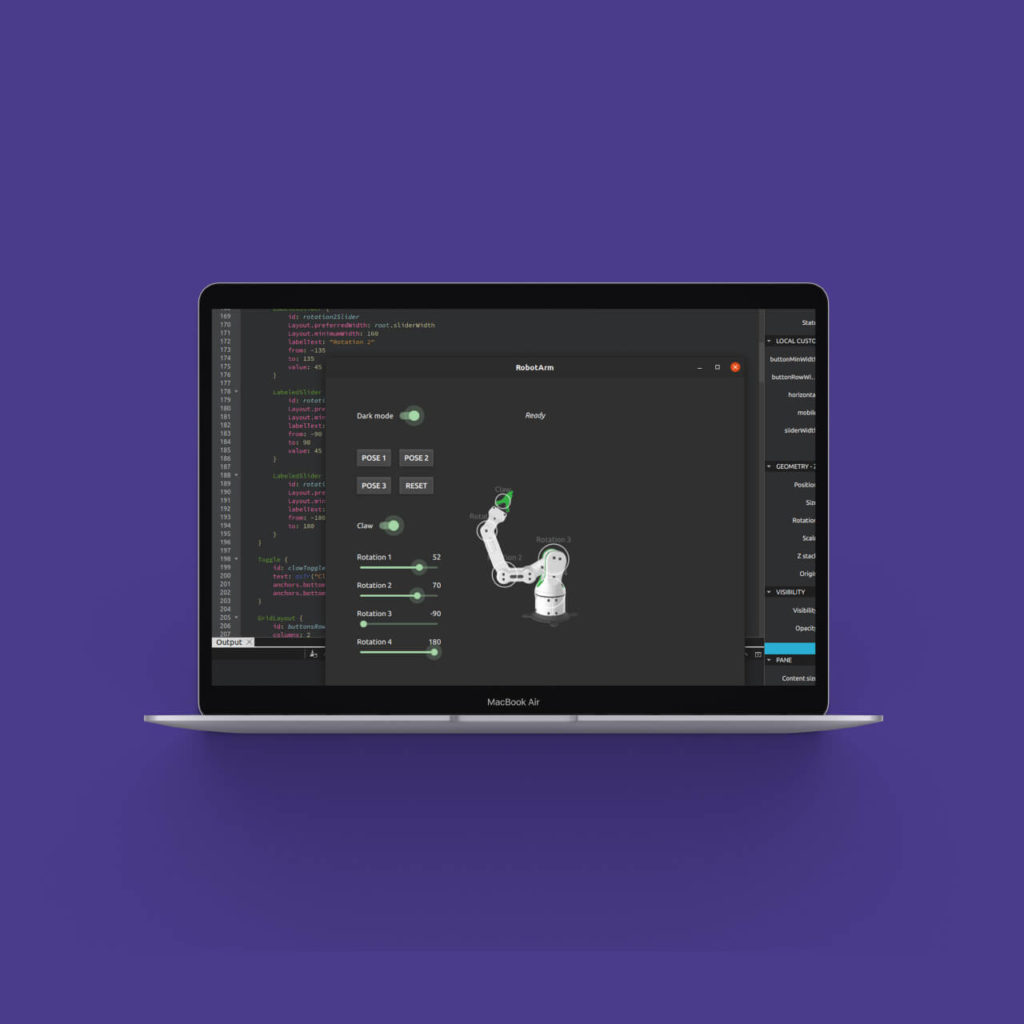
Qt Design Studio example: The Robot Arm prototype by Spyrosoft Synergy


Spyrosoft Synergy partnered with the Qt Company to create a prototype example featured in the latest release of Qt Design Studio.
We spoke directly with Przemysław Krzywania, the Project Manager leading this project, along with the rest of the team involved, in order to share the main goal of the Robot Arm example and the requirements they needed to meet.
Project objective: What was the goal of the Qt Design Studio example?
Our collaboration with Qt aimed to create a sample project that demonstrates how easy and quick it is to design interfaces with their tool. As a result, our sample project, titled Robot Arm, was released as an official example for the new version of Qt Design Studio in June 2022.
Qt Design Studio is a tool for creating functional user interfaces. Designs made in tools like Figma or Photoshop can be easily integrated into the environment. After that, it then generates functional user interface code ready for developers to use, making integration and collaboration a breeze.
How we built the Robot Arm
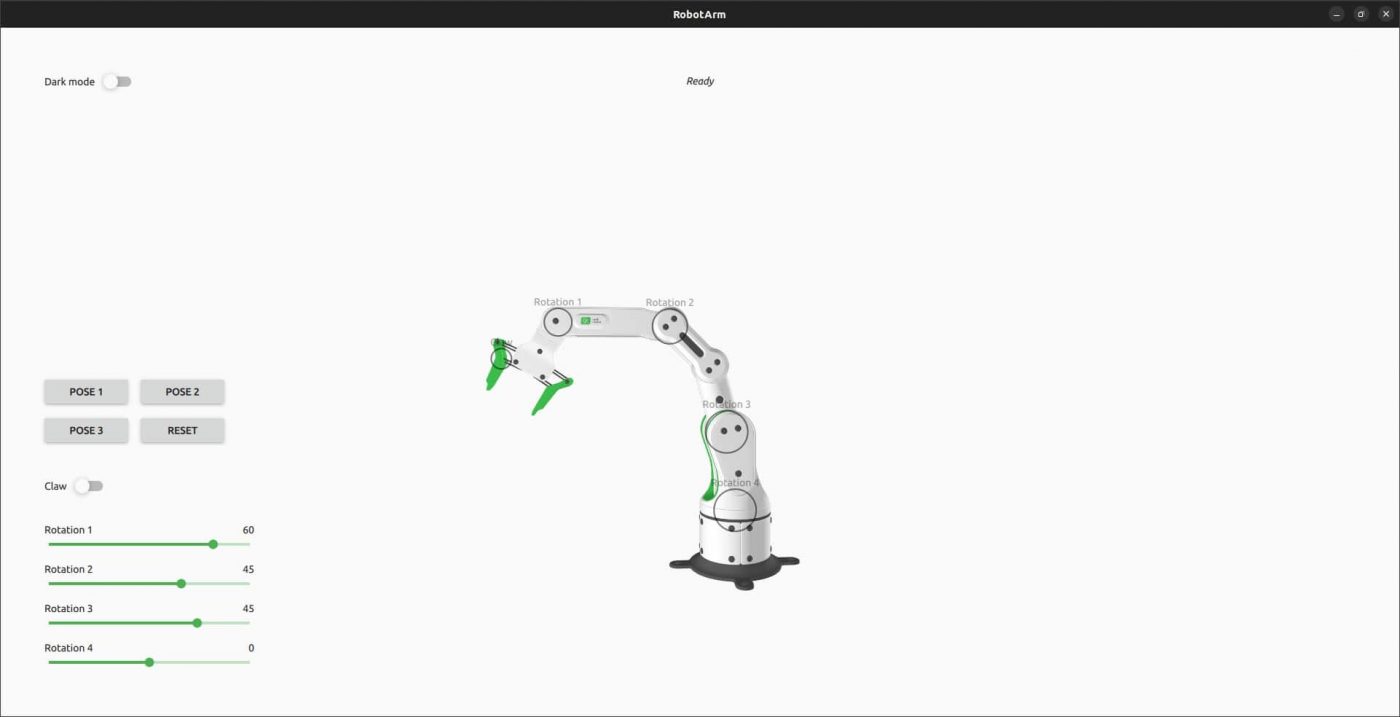
The Robot Arm example created by the Spyrosoft Synergy team shows how 2D elements can effectively control 3D elements, such as the robot arm. Furthermore, it demonstrates how to connect a C++ backend and utilise QML for mock-up purposes.
The team responsible for the project included Przemysław Krzywania (Project Manager), Szymon Wojtach (Junior C++ Software Engineer), Łukasz Ornatek (Senior C++ Software Engineer), Bartosz Matynia (Product Designer), and Irina Rychkova (Junior Product Designer).
Design & development process: Hear from our Qt designers and engineers
Szymon Wojtach: “Initially, the project began with a meeting with the client. We discussed their needs and requirements for the Robot Arm example. They placed a lot of focus on simplicity. Together, we created an outline for the desired functionalities. On this basis, Irina created the designs using materials provided by the client. After accepting the designs, the development work commenced. We developed the functionalities in iterations. Then, we presented the next stages of development at weekly meetings with the client.”
Łukasz Ornatek: “My role in the project was to support Szymon in tasks that required more experience. Specifically, I planned the architecture of the project to minimise complexity. I also ensured compliance with the new standards and best practices recommended by Qt.”
Bartosz Matynia: “As a 3D designer, I was responsible for creating the model of the Robotic Arm. It needed to have the necessary freedom of movement. In addition, I created a simple rig for the model and verified that there were no intersecting parts in various poses. I also made sure that the design and colours closely aligned with the brand identity. After the client approved the design, I optimised the model to run smoothly on all devices.”
Irina Rychkova: “My responsibility was to create a pixel-perfect design, which took me a few weeks. I used components already established in the Qt Design Studio framework. Throughout the process, I focused on maintaining simplicity in the design, using different shades of grey to draw attention to the Robot Arm 3D model.”
Why simplicity matters when you integrate logic into Qt Design Studio example

In short, the most challenging aspect of this project was to build it in the simplest way possible. This was especially important because it was intended to serve as an example for developing similar projects in Qt Design Studio. At the same time, it needed to be compatible with Qt Creator. Our primary focus was on maintaining simplicity and good readability. This meant minimising complexity and limiting functionalities. In fact, one of the key principles of this tool is to empower designers to create advanced interactive designs without needing to write a single line of code.
Thanks to agile team cooperation and the use of Qt technologies, we successfully completed the project on time and within the planned budget.
Need help creating a Qt Design Studio example?
Spyrosoft Synergy experts specialise in rapidly creating high-quality prototypes utilising advanced design technology. For further information, visit our offering page or reach out to us by filling out the form below.
FAQ
Yes, you can integrate a C++ backend with your designs. This is exactly what we did in the Robot Arm example – we implemented backend logic while keeping the UI simple and clean. This approach allows you to maintain flexibility in how your application behaves and connects to real-world functionality.
Out of the box, it generates QML and C++ code, but you can incorporate it into Python-based workflows via PySide6, the official Python binding for the framework. While Python isn’t directly integrated into the IDE, developers often use Qt for Python to build applications with user interfaces designed in the visual design tool. Additionally, community tutorials are available for combining QML-based UIs with Python logic.
Yes, you can create and build dialogs using Qt Quick components. These dialogs can be customised and connected to backend logic via QML and C++ or even Python if you’re using Qt for Python. This helps build intuitive and interactive UI elements dynamically, enhancing your app’s productivity and user experience.
Absolutely. It’s widely used for building Human-Machine Interface systems in industries like automotive, industrial automation, and healthcare. It enables teams to rapidly develop complex HMI UIs featuring animated elements, real-time updates, and seamless integration with server-side systems. It’s also ideal for cross-platform development and works well with Qt Creator for further coding.


arrow_circle_rightContact us
Talk to our expert about enabling continuous HMI Development in your company

Przemyslaw Krzywania
HMI Director
arrow_circle_right Other articles