A step-by-step guide to Computer Vision AutoML in Microsoft Azure
Creating the project
We begin with the dataset. We decided to use steel defects dataset called NEU-DET [1]. The dataset contains 1800 annotated images of 6 classes of steel defects. You can see those defects in the figure below.
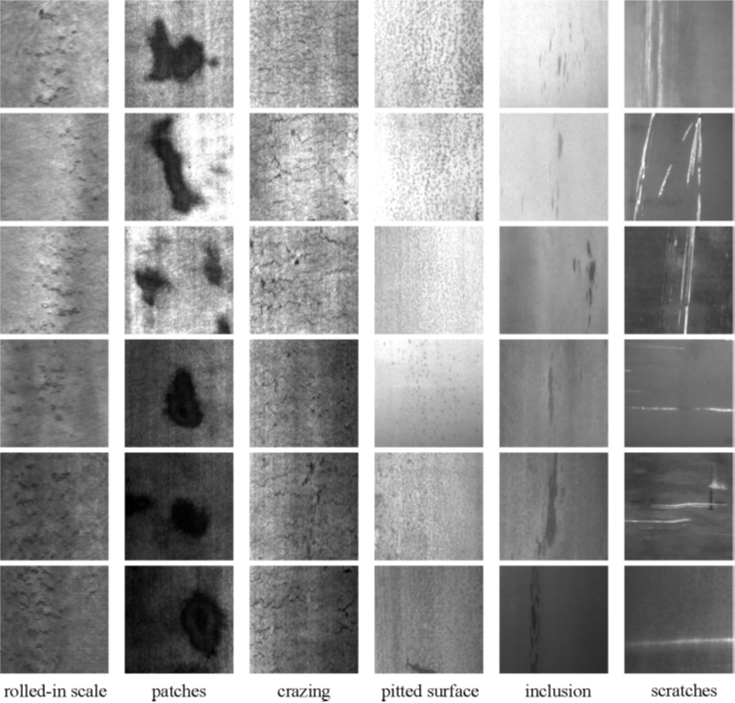
Fig.1. NEU-DET classes (source: [1])
Currently Azure Custom Vision supports image classification and object detection tasks. When creating the project, we chose General domain. If the model was to be deployed on the edge, we would have chosen the General (compact) domain instead. Training compact model allows us to export the model after training and to deploy it on an edge device (i.e., in a factory, a shop etc.).
Dataset can be uploaded directly to the Azure Custom Vision through the web UI or using SDK. We opted for SDK since it gives us an option to upload images in batches. For that, we followed the Custom Vision documentation Quickstart: Create an object detection project with the Custom Vision client library. We also applied a couple of image transformations to remain compliant with the Custom Vision requirements. We resized the images and bounding boxes to 256×256 pixels and converted them to RGB. We uploaded 400 random images representing 3 out of the 6 available classes: inclusions, patches and scratches.
Once the upload is finished, we can see the images in the portal:
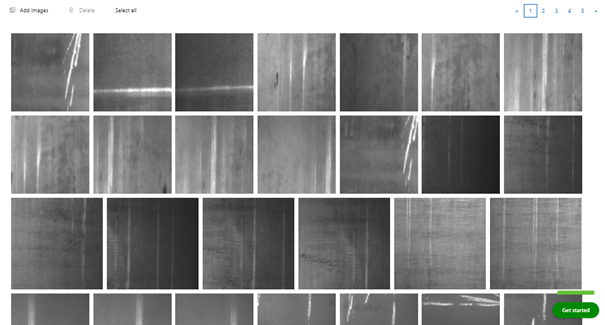
Fig. 2. Uploaded images in the Custom Vision UI
After selecting a single image, we can see the bounding boxes:
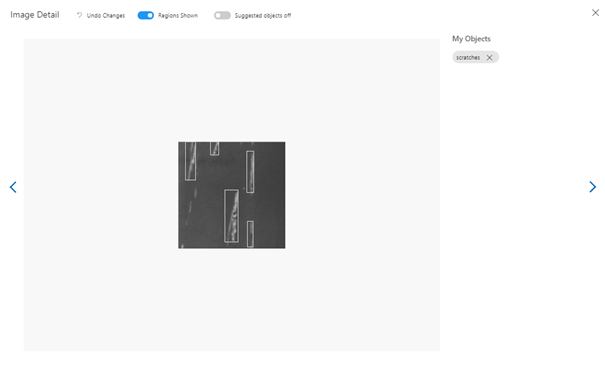
Fig. 3. Bounding boxes for a single image in Custom Vision UI
Training and optimisation
Once we confirmed that everything is looking fine, we could move forward to training the model. There are 2 options available in the Custom Vision tool. The first one is a Quick Training method and the second is Advanced Training, which allows us to specify training budget, i.e. the number of hours that the model will train.
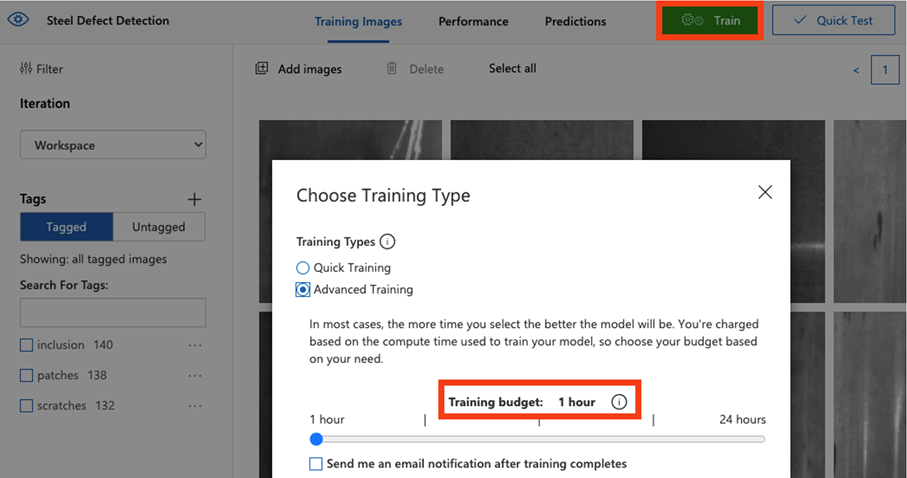
We decided to test the model after just 1h of training. The results are as follows:
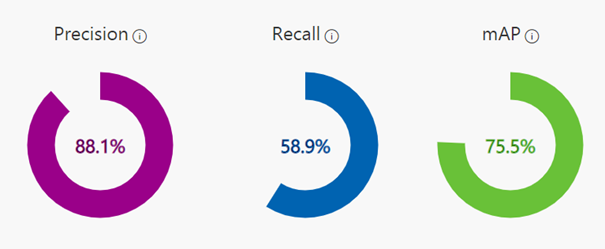
Fig. 4. Model performance metrics with default prediction thresholds
Detecting all possible defects, at a cost of larger number of false positives might be more important than having more confidence in predictions. Custom Vision offers fluent prediction thresholds adjustment to improve model performance. In our case we prefer higher Recall over high Precision. It is important not to lower those thresholds too much as the model performance will suffer significantly. E.g., having low probability threshold will lead to increased number of false positives. If the model is supposed to be deployed in a production setting, we can’t be stopping the production line for every false positive detection produced by the model. Finding a balance is the key.
For the problem that we are working with right now we decided to set our KPIs as follows:
- The main metric to optimize for is mAP – it cannot be any lower than 85%
- The Recall and Precision are equally important, and both should stay above 80%
After a few minutes of fiddling with the thresholds and looking at the model predictions we arrive at the following thresholds:
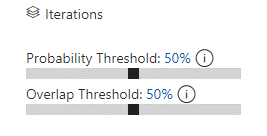
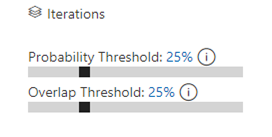
Fig. 5. Default (left) and adjusted (right) prediction thresholds
Reducing both thresholds to 25% yielded following results:
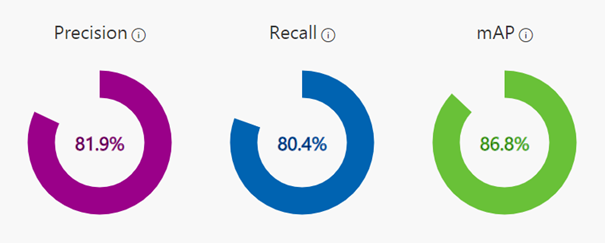
Fig. 6. Model performance metrics after adjusting the prediction thresholds
Our main metric is satisfied – mAP is equal to 86.8%. Precision and Recall are both above 80% which is also great. To be sure further analysis on test data can be performed by uploading new images to the Custom Vision tool and examine the predictions.
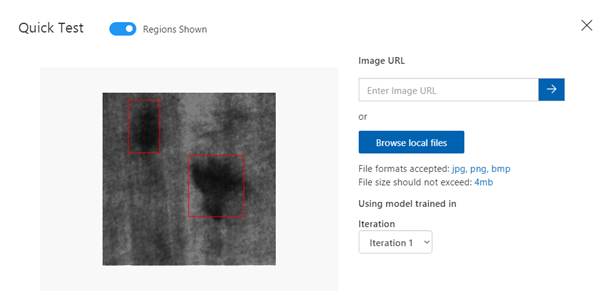
Fig. 7. Model predictions on unseen data
Deployment
Model seems to be working as expected. It is time for us to deploy a prediction endpoint.
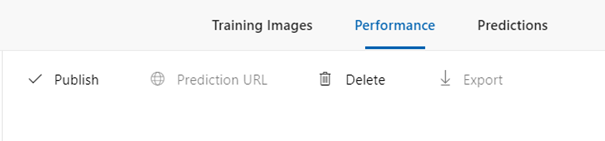
Fig. 8. The publish option in Custom Vision UI
Once the publish process has finished, we can start using our model to get predictions on new data. We can see that a “Published” label appeared next to our iteration in the left-hand sidebar, and its name is now visible in the description of the iteration. We can retrieve the information required to run the predictions by selecting Prediction URL and Prediction-Key.
Summary
In this article we presented how easy and quick it is to build a computer vision model for object detection. Azure Custom Vision gave us a model that can be quickly evaluated by our customers without the need for MLOps engineers. It also gave us a solid baseline to test our own models against it.
Case Studies